What an Ophthalmic Ultrasound Machine Is Designed to Do?
Ophthalmic ultrasound machine is a diagnostic imaging tool primarily used for two purposes: measuring the length of the eye for cataract surgery (A-Scan) and visualizing the back of the eye when the view is blocked by cataracts or blood (B-Scan).
Typical clinical applications include:
- Retinal detachment detection
- Vitreous opacity evaluation
- Intraocular tumor screening
- Axial length measurement for IOL calculation
- Orbital mass or foreign body assessment
Because the eye is small and highly sensitive, ophthalmic ultrasound equipment is purpose-built with specific probes, frequencies, and safety limits.
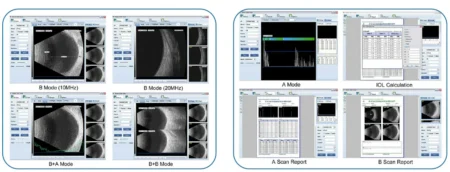
Understanding the Main Ultrasound Modes in Eye Care
The ophthalmic ultrasound machine employs high-frequency sound waves to produce images or measurements of the eye’s internal anatomy. The two primary modalities are:
- A-Scan Ultrasound: Provides one-dimensional measurements, primarily axial length, essential for intraocular lens calculations.
- B-Scan Ultrasound: Produces two-dimensional cross-sectional images to evaluate the posterior segment when direct visualization is obstructed.
Most modern ophthalmic ultrasound units, including those from LINK Instruments, support both modes in a single device.
How to Use Ophthalmic Ultrasonic Scanning Machine
Preparing the Ultrasonic Scanning Machine Before Examination
Before the patient arrives at the machine, complete these essential steps to ensure safety and hygiene:
1.Probe Inspection:
Visually check the transducer for any cracks or frayed cables. Damaged probes can leak gel or cause electrical shocks.
2.Disinfection:
Clean the probe tip using a non-abrasive soap and water solution or a manufacturer-approved disinfectant (e.g., 70% isopropyl alcohol for some probes, but always check the manual).
3.Patient Positioning:
Seat the patient comfortably. For B-scans, they are often reclined. Numb the eye(s) with an anesthetic drop (like Proparacaine) even if only one eye is being examined, to help with comparison and patient comfort.
4.Machine Setup:
Calibrate the unit using a plastic test block if available and select the correct application preset (Phakic, Aphakic, or Pseudophakic).
Performing an A-Scan (Biometry)
The A-scan measures the axial length of the eye, typically to calculate IOL power for cataract surgery.
Step-by-Step Approach:
-
Select Technique: Choose between the Contact (probe touches cornea) or Immersion (saline-filled shell) method. Immersion is generally more accurate as it prevents corneal compression.
-
Fixation: Ask the patient to look straight ahead at a fixation target.
-
Application: Contact: Gently touch the center of the cornea. Do not press, as indention shortens the measurement.
Immersion: Place the scleral shell, fill it with saline, and dip the probe into the fluid without touching the eye.
-
Capture the Image: Look for a 1D graph with five high, steep “spikes”: Cornea, Anterior Lens, Posterior Lens, Retina, and Sclera.
-
Verify Data: Obtain 3–10 consistent readings with less than 0.1 mm variation.
Performing a B-Scan (Structural Imaging)
The B-scan provides a 2D cross-section of the eye, vital when the view is blocked by cataracts or blood.
Step-by-Step Approach:
-
Apply Coupling Gel: Use a water-based ophthalmic gel (standard PT gels can be irritating). Apply it to the probe or the patient’s closed eyelid.
-
Orientation (The Marker Rule): Locate the white dot or line on the probe. By convention, this marker should point Superiorly (up) or Nasally (toward the nose).
-
Scanning Maneuvers:
- Transverse Scan: Place the probe parallel to the limbus. Sweep the probe from the limbus toward the fornix to view a quadrant from posterior to anterior.
- Longitudinal Scan: Rotate the probe so the marker points toward the pupil. This provides a radial view from the optic nerve out to the periphery.
- Axial Scan: Ask the patient to look straight ahead; place the probe directly over the pupil to see the lens and optic nerve in one frame.
Adjustment: Adjust the Gain settings. High gain is better for seeing vitreous floaters; low gain is better for defining dense structures like tumors.
Maintenance and Storage
-
End-of-Shift: Wipe the machine and probes. Store transducers in their dedicated holders to prevent cable strain.
-
Calibration: Regularly verify accuracy using the test block.
-
Data Backup: Perform full system backups of presets and patient data to minimize downtime in case of software failure.
Ultrasound A/B Scan of Key Differences
| Feature | A-Scan | B-Scan |
| Output | 1D Graph (Spikes) | 2D Image (Sonar Map) |
| Primary Use | Measuring Axial Length | Visualizing Pathology (Retinal Detachment) |
| Common Frequency | ~10 MHz | 10–20 MHz |
Key Considerations
- Pressure: Apply minimal to no pressure, especially with trauma, to avoid globe rupture.
- Energy: Use the lowest possible energy settings to prevent thermal injury, especially to the lens.
- Anatomy: Look for the bright posterior globe (choroid/retina), the darker lens, and the optic nerve sheath extending backward.
- Movement: Ask the patient to move their eyes to check for free-floating vitreous hemorrhage or debris.
Tips for Optimal Use
How to choose the Right Ultrasound System?
When selecting a machine, eye‑care professionals consider:
- Image resolution
- Probe quality and frequency
- Software clarity
- Measurement repeatability
- Ease of use
- Manufacturer support and training availability
Reputable manufacturers—such as Shanghai LINK (linkeyegroup.com)—offer ophthalmic ultrasound systems designed for stable performance and clear clinical imaging.
Recoment Product:
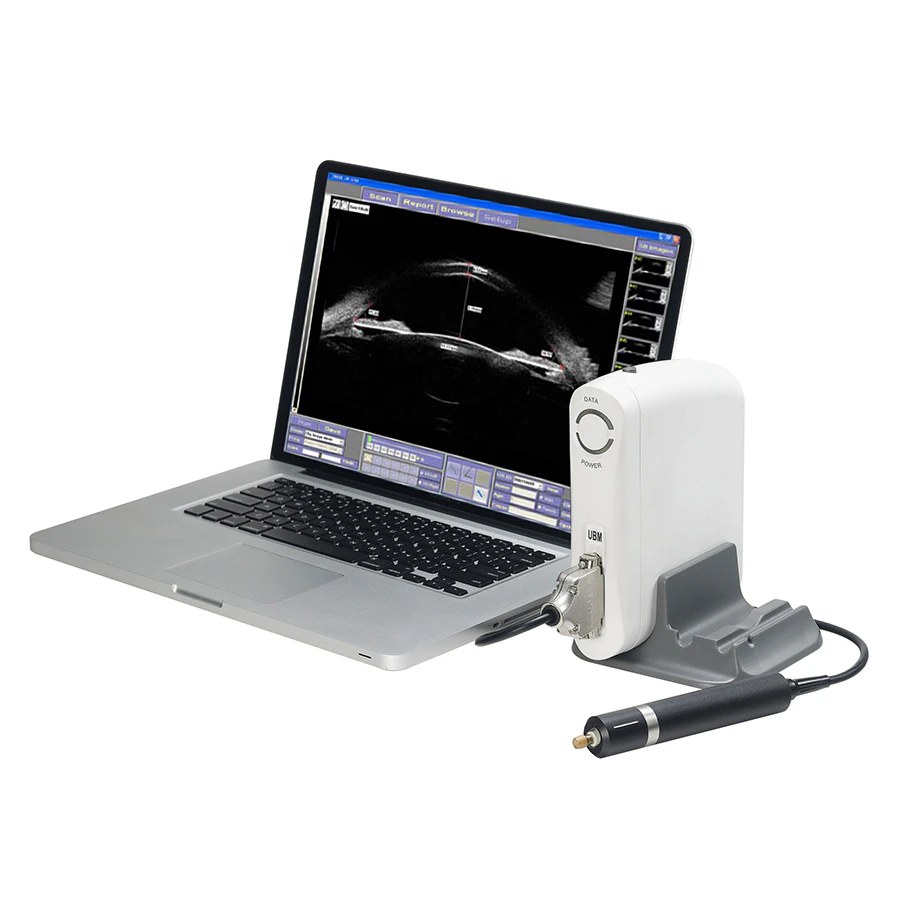 SW-2100 Ophthalmic AB Scan Machine |
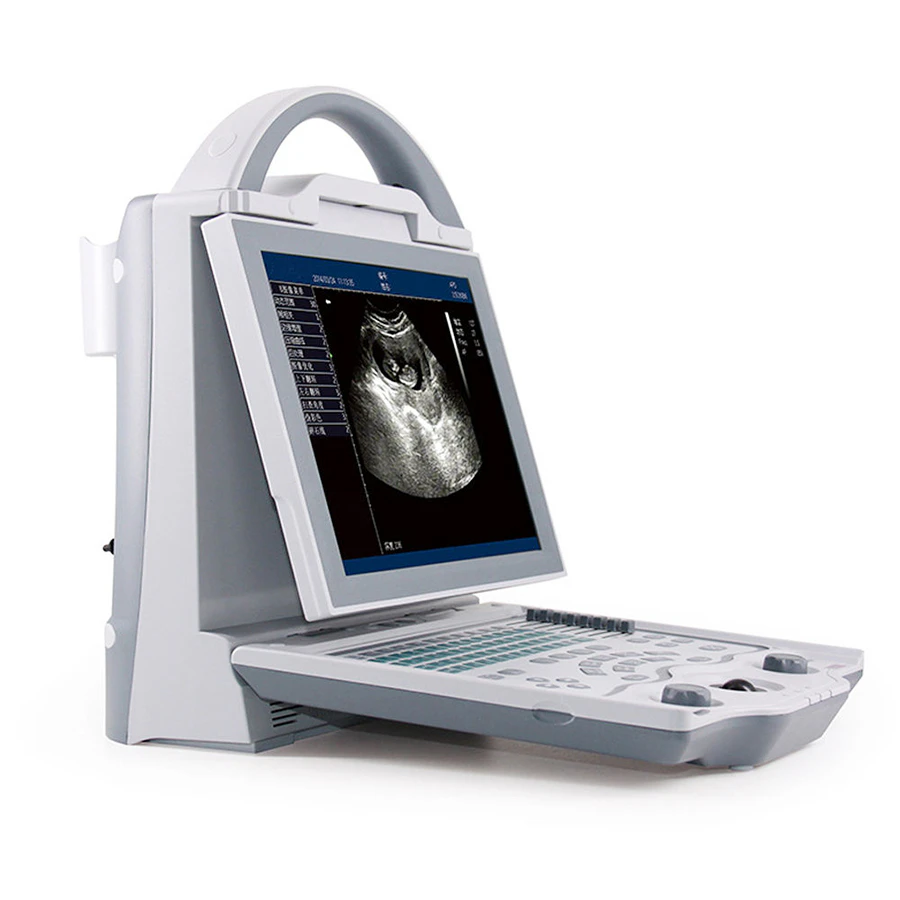 ASP-100AB Ophthalmic A and B Scan Machine |
Conclution
Ophthalmic ultrasound is not just a backup—it’s a diagnostic lifeline when the view is blocked. Used correctly with certified equipment, it enables timely, sight-saving decisions.


